7 Simple Steps to Waterproofing Exterior Walls
May 15th 2023
Water damage is a common problem that every structure faces, especially during the rainy season. Water can seep through the exterior walls and cause extensive damage to the building. This is why it is important to take preventive measures and waterproof your exterior walls. In this blog post, we will provide you with seven simple steps to waterproof exterior walls and protect your building from water damage.
Assessing the Condition of Exterior Walls:
Assessing the condition of your exterior walls is the first step in waterproofing them. It is important to identify any cracks, holes, or gaps in the walls that need to be repaired before waterproofing. Here are some tips to help you assess the condition of your exterior walls:
- Conduct a Visual Inspection: Walk around the exterior of your structure and conduct a visual inspection of the walls. Look for any cracks, holes, or gaps in the walls that need to be repaired. Use a flashlight to check for any areas that are hard to see.
- Check for Water Stains: Look for water stains on the exterior walls. Water stains are an indication that water is seeping through the walls and causing damage.
- Look for Efflorescence: Efflorescence is a white, powdery substance that appears on the surface of masonry walls. It is caused by the accumulation of salts in the wall material. Efflorescence is an indication of water damage and should be addressed before waterproofing.
- Check for Mold and Mildew: Mold and mildew thrive in damp environments. Look for any signs of mold and mildew on the exterior walls. Mold and mildew are an indication of water damage and should be addressed before waterproofing.
- Inspect the Mortar Joints: Mortar joints are the spaces between the bricks or stones in the wall. Inspect the mortar joints for any signs of cracking or deterioration. Cracked or deteriorated mortar joints are an indication of water damage and should be addressed before waterproofing.
- Check for Insect Damage: Insects such as termites and carpenter ants can cause extensive damage to the walls of your home. Look for any signs of insect damage on the exterior walls. Insect damage is an indication of water damage and should be addressed before waterproofing.
By assessing the condition of your exterior walls before waterproofing, you can identify any areas that need to be repaired and prevent water damage from occurring in the future.
Cleaning Walls:
Cleaning the walls is an essential step in the waterproofing process as it ensures that the surface is free of dirt, dust, and debris, which can affect the adhesion of the waterproofing material. Here are some tips on how to clean your walls:
- Use a Pressure Washer: A pressure washer is an effective tool for cleaning the walls. It uses a high-pressure water spray to remove dirt, dust, and debris from the surface of the walls. Be sure to follow the manufacturer's instructions when using a pressure washer to avoid damaging the walls.
- Use a Cleaning Solution: You can also use a cleaning solution to clean the walls. Mix a solution of water and cleaning solution in a bucket, and apply it to the walls using a sponge or a brush. Be sure to follow the manufacturer's instructions when using a cleaning solution.
- Start from the Top: When cleaning the walls, start from the top and work your way down. This ensures that the dirty water flows down and does not leave streaks on the walls.
- Use a Soft Bristle Brush: Use a soft bristle brush to scrub the walls gently. This will help remove dirt and debris without damaging the surface of the walls.
- Rinse the Walls Thoroughly: After cleaning the walls, rinse them thoroughly with water to remove any remaining dirt or cleaning solution. Use a hose or a bucket of water to rinse the walls.
- Allow the Walls to Dry: After rinsing the walls, allow them to dry completely before applying the primer. This ensures that the surface is completely dry and free of moisture.
Cleaning your walls thoroughly before waterproofing will make sure that the waterproofing material adheres properly and provides maximum protection against water damage.
Applying Primer:
Applying a primer is an important step in the waterproofing process as it creates a smooth, even surface for the waterproofing material to adhere to. Here are some tips on how to apply a primer:
- Choose the Right Primer: There are different types of primers available for exterior walls, including oil-based and latex-based primers. Choose the right primer based on the type of surface you are working on and the type of waterproofing material you will be using.
- Prepare the Surface: Before applying the primer, ensure that the surface of the walls is clean and free of any dirt, dust, or debris. Use a pressure washer or a cleaning solution to clean the walls if necessary.
- Apply the Primer: Use a roller or a brush to apply the primer to the walls. Start from the top and work your way down, applying the primer evenly in a vertical or horizontal direction. Be sure to follow the manufacturer's instructions when applying the primer.
- Allow the Primer to Dry: After applying the primer, allow it to dry completely before applying the waterproofing material. This ensures that the surface is completely dry and free of moisture.
- Apply a Second Coat: In some cases, it may be necessary to apply a second coat of primer. This will help create a smoother and more even surface for the waterproofing material to adhere to. Be sure to follow the manufacturer's instructions when applying the second coat.
Applying a primer to the walls before waterproofing ensures that the waterproofing material adheres properly and provides maximum protection against water damage.
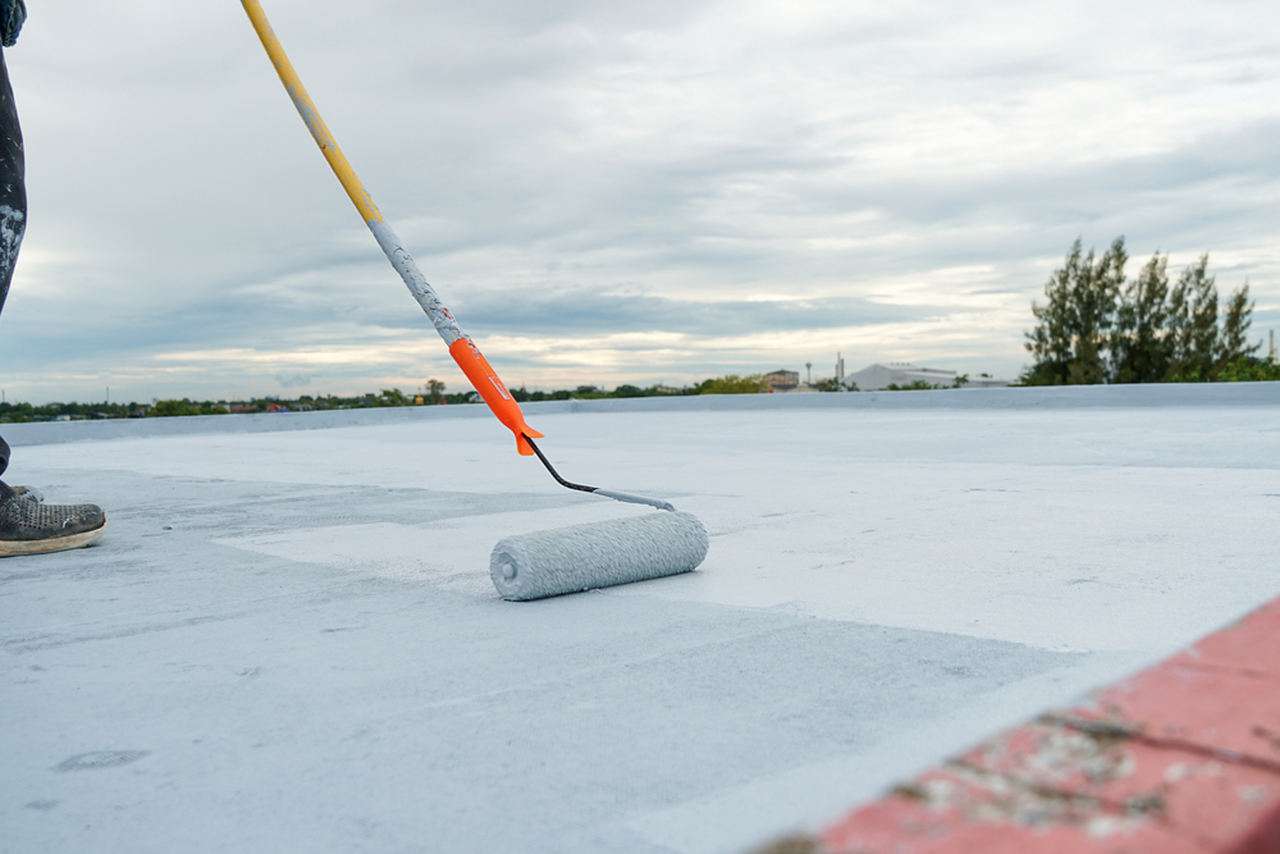
Applying the Waterproofing Material:
Applying the waterproofing material is a crucial step in the waterproofing process, as it is what provides the actual protection against water damage. Here are some tips on how to apply the waterproofing material:
- Choose the Right Waterproofing Material: There are different types of waterproofing materials available, including liquid-applied membrane, cementitious coating, and bituminous coating. Choose the right material based on the type of surface you are working on and the level of protection you need.
- Prepare the Surface: Before applying the waterproofing material, ensure that the surface of the walls is clean and free of any dirt, dust, or debris. Use a pressure washer or a cleaning solution to clean the walls if necessary. Also, ensure that the primer has dried completely.
- Apply the Waterproofing Material: Use a roller or a brush to apply the waterproofing material to the walls. Start from the top and work your way down, applying the material evenly in a vertical or horizontal direction. Be sure to follow the manufacturer's instructions when applying the waterproofing material, including the number of coats required.
- Allow the Material to Dry: After applying the waterproofing material, allow it to dry completely before applying any additional coats or proceeding to the next step in the process. The drying time will depend on the type of material used and the weather conditions.
- Apply Additional Coats: Depending on the type of waterproofing material used, it may be necessary to apply additional coats for maximum protection. Be sure to follow the manufacturer's instructions when applying additional coats.
Be sure to follow these tips when applying the waterproofing material to ensure that the material is applied evenly and thoroughly.
Sealing the Joints:
Sealing the joints in your exterior walls is an important step in waterproofing them, as it prevents water from seeping through any gaps or cracks. Here are some tips on how to seal the joints:
- Choose the Right Sealant: There are different types of sealants available, including silicone, polyurethane, and acrylic sealants. Choose the right sealant based on the type of surface you are working on and the level of protection you need.
- Prepare the Surface: Before applying the sealant, ensure that the surface of the walls is clean and free of any dirt, dust, or debris. Use a pressure washer or a cleaning solution to clean the walls if necessary.
- Apply the Sealant: Use a caulking gun to apply the sealant to the joints in the walls. Start from the top and work your way down, applying the sealant evenly in a continuous bead. Be sure to follow the manufacturer's instructions when applying the sealant, including the drying time and any necessary tools.
- Smooth Out the Sealant: Use a caulking tool or your finger to smooth out the sealant and ensure that it adheres properly to the walls. This will also help create a neat and tidy finish.
- Allow the Sealant to Dry: After applying the sealant, allow it to dry completely before applying any additional coats or proceeding to the next step in the process. The drying time will depend on the type of sealant used and the weather conditions.
Following these tips when sealing the joints to ensure that the sealant adheres properly and creates a neat finish.
Installing Drainage:
Installing drainage systems around your home is an important step in waterproofing your exterior walls, as it helps direct water away from the walls and prevents it from accumulating. Here are some tips on how to install drainage systems:
- Gutters and Downspouts: Install gutters and downspouts on your roof to direct water away from your home's foundation. Ensure that the gutters are clean and free of debris to prevent clogging, and make sure that the downspouts extend at least six feet away from the foundation.
- French Drains: Install French drains around your home to collect and divert water away from the walls. A French drain consists of a trench filled with gravel or rock and a perforated pipe that allows water to flow through. The trench should be sloped away from the home's foundation to ensure proper drainage.
- Sump Pumps: Install a sump pump in your basement or crawl space to remove excess water that may accumulate during heavy rainfall or flooding. Ensure that the sump pump is in good working condition and that the discharge pipe extends at least six feet away from the foundation.
- Slope the Ground: Ensure that the ground around your home is sloped away from the foundation to prevent water from accumulating near the walls. The slope should be at least one inch per foot for a distance of six feet.
- Seal Basement Walls: If you have a basement, seal the walls to prevent water from seeping through. Use a waterproofing paint or a sealant to coat the walls and ensure that they are completely dry before applying the coating.
Regular Maintenance:
Regular maintenance is important in ensuring that your waterproofing remains effective and your exterior walls are protected against water damage. Here are some tips on how to maintain your walls:
- Inspect Your Walls Regularly: Inspect your walls regularly for any signs of damage, including cracks, holes, or discoloration. Address any issues immediately to prevent further damage.
- Repair Any Damage: If you notice any damage to your walls, such as cracks or holes, repair them immediately. Use a waterproofing material or sealant to fill in any gaps or cracks.
- Check Gutters and Downspouts: Check your gutters and downspouts regularly to ensure that they are clean and free of debris. Clogged gutters and downspouts can cause water to overflow and accumulate near your walls, causing water damage.
- Test Your Sump Pump: If you have a sump pump, test it regularly to ensure that it is in good working condition. Pour water into the sump pit to activate the pump and check that it is functioning properly.
- Reapply Waterproofing Material: Depending on the type of waterproofing material used, you may need to reapply it every few years. Check with the manufacturer to determine the recommended frequency of reapplication.
- Monitor Drainage: Monitor the drainage around your home to ensure that water is being directed away from your walls. If you notice any issues, address them immediately.
By regularly maintaining your exterior walls, you can ensure that they remain protected against water damage and that your waterproofing remains effective. Be sure to follow these tips to maintain your walls and seek professional help if needed.
In conclusion, waterproofing your exterior walls is a simple but important step in protecting your home from water damage. By following these seven simple steps, you can ensure that your home is well-protected against water damage. Remember to assess the condition of your walls, clean them thoroughly, apply a primer, apply the waterproofing material, seal any joints, install drainage, and perform regular maintenance. If you are unsure about any of these steps, seek professional help to ensure that your waterproofing is done correctly.